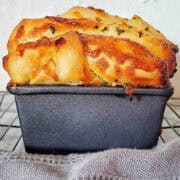
Garlic Herb Bread
Garlic Herb Bread is a cheesy loaf of homemade garlic bread. Using simple ingredients and a step by step method this yeast bread is utterly delicious.
Servings: 10
Calories: 206kcal
Ingredients
Bread
- 3 ⅓ cups/560 grams plain flour Note 1
- 1 ½ teaspoons/7 grams instant yeast Note 2
- 1 tablespoon/20 grams sugar
- 1 teaspoon/6 grams salt
- 1 ⅓ cups/560 grams milk Note 3
- 2 tablespoons/40 grams softened butter Note 4
Garlic Butter
- 150 grams butter unsalted
- 3 tablespoons garlic Note 6
- ¼ cup/half a bunch flat leaf parsley
- 1 ½ cups mozzarella cheese
Instructions
- Loaf tin: grease a 21 x 11 x 7 cm non stick loaf pan (8.3 x 4.5 x 2.75") with cooking spray.
- Dough: add the plain flour, instant yeast, sugar, salt, milk and butter to a greased food processor bowl (also lightly grease the inner lid). Blitz for 40 seconds to combine then tip out on a lightly floured surface and knead for less than 30 seconds. Place dough ball into a greased large mixing bowl. Cover it with plastic wrap and a tea towel. Let it rise for 1 hour.
- Garlic butter: add the softened butter, garlic and chopped parsley to a small mixing bowl and stir till consistently mixed together. Set aside.
- Roll: remove the tea towel and discard the cling wrap from the risen dough. Roll it out onto the bench to form a circle (about the size of a large pizza).
- Layer: dollop the garlic butter out across the rolled dough (I do about 5-6 seperate spoonfuls). Then use the back of a soup spoon to spread this out across the dough leaving a plain border at the edges.
- Slice: use a pizza cutter (or knife) to make 3 slices across the dough in 2 opposing directions. This will leave you with around 16 pieces the size of ½ piece of standard bread. Working one at a time take a piece and stack it into the palm of your hand. Then place this stack vertically into the greased loaf tin. Repeat until all of the bread pieces are in the tin.
- Cover and rise: now cover the bread in the loaf tin with plastic wrap and a tea towel and let rise for 25 minutes.
- Preheat oven: to 180°C / 350-375°F / Gas Mark 4-5.
- Oven bake: after the 25 minutes is up, remove the tea towel and discard the plastic wrap. Place a tent (Note 6) over the top of the bread and place it into the oven on the middle shelf. Pour a cup of water into a baking dish on a shelf under the bread (Note 7). Let the bread bake for 30-35 minutes.
- Remove from oven: once the cook time is up, use oven mitts to remove the bread and set it onto a heatproof surface. Remove the tent and discard. Let the bread rest in the tin for 5-10 minutes. Then use a butter knife around the edges (all 4) to break the seal and gently remove the bread from the tin.
- To serve: serve the bread hot and fresh from the oven. Allow people the tear and share, pull it apart and pull pieces of it. Serve with your favorite mains with a side salad.
Video
Notes
- Note 1 - Flour: this is plain flour, not self-raising flour or bread flour. No need to sift it.
- Note 2 - Yeast: this is instant yeast. It is the type that doesn't need liquid to active it.
- Note 3 - Milk: you can use either full cream milk or skin milk. Both work. Use your favorite.
- Note 4 - Butter: this is the spreadable type of butter from a tub. I measure each tablespoon, level it then chop it in half with a butter knife. Then I add the 4 pieces to the food processor. When testing this recipe along the way by using a mixing bowl and spatula to mix the dough I found that the butter was the hardest ingredient to consistently mix. Making it smaller pieces helps, as does the food processor method.
- Note 5 - Garlic: I like to use store bought chunky chopped garlic for this recipe. It is so very good! If you prefer to use fresh garlic cloves you can
- Note 6 - Tent: making a tent to cover the bread is the best way to ensure that is cooks through without burning. We use 2 layers for this. One layer is aluminum foil and the 2nd is parchment paper. Use a little cooking spray to stick these 2 together then fold at the edges and open in the middle. I prefer to tent the bread for the entire cook time as I find it gives the best results. You could also cook the bread for 15 minutes and then tent it for the remaining cook time.
- Note 7 - Steamy oven: adding water to the oven allows it to create a steamy environment as the bread cooks. I add about 1 cup of water to a baking tray underneath the bread. I have tried the bread recipe with and without the water and found that adding the water to create the steamy oven works best.
Nutrition
Calories: 206kcal | Carbohydrates: 3g | Protein: 5g | Fat: 19g | Saturated Fat: 12g | Polyunsaturated Fat: 1g | Monounsaturated Fat: 5g | Trans Fat: 1g | Cholesterol: 55mg | Sodium: 466mg | Potassium: 91mg | Fiber: 0.3g | Sugar: 2g | Vitamin A: 738IU | Vitamin C: 3mg | Calcium: 136mg | Iron: 0.2mg